How to Build a Console Cabinet
>

Jenn Largesse
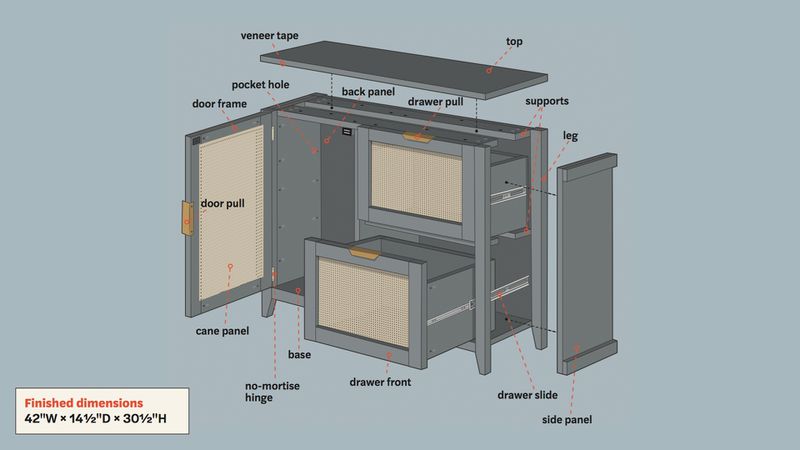
Using pocket-hole joinery and plywood from the home center, This Old House DIY expert Jenn Largesse shares the steps she used to turn a complex build into an easy assembly
This article appeared in the Fall 2021 issue of This Old House MagazineClick here to learn how to subscribe
Why do we build? For me, the motivation is often practical: I see a piece of furniture that I love, but can’t abide the hefty price.
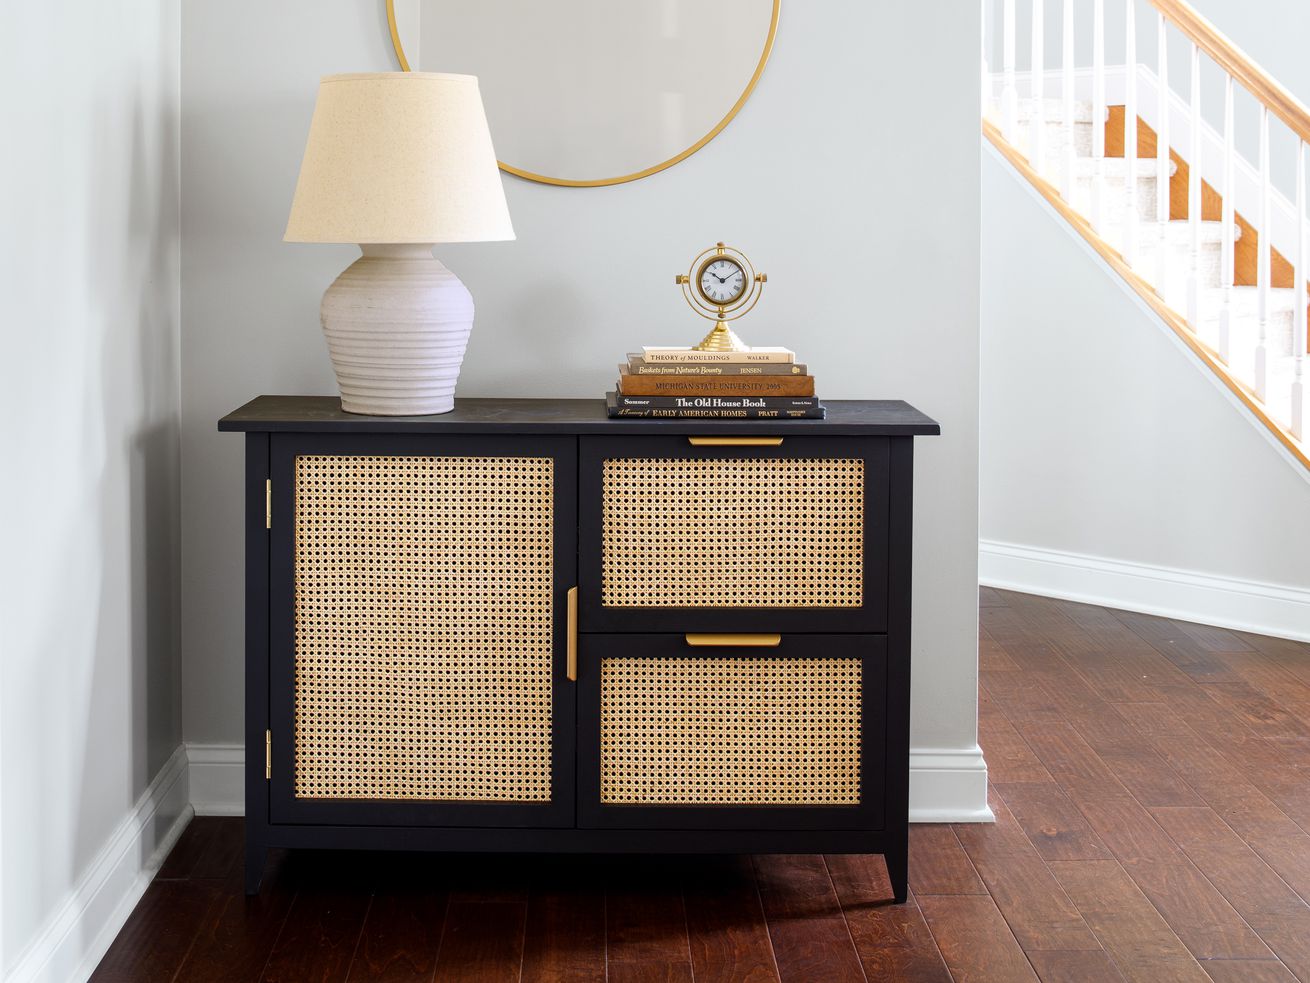
Take this console cabinet, for example. I spotted a similar one online for $325. I loved its striking black color and cane door and drawer- front details. So I snapped a photo and did some research. My penny-pinching instincts again proved correct: I found that I could build it for about half the cost of the original.
That was motivation enough for me to sketch out a plan and head to the home center to pick up some materials. Back in my workshop, I cranked up the music and was ready to make some sawdust. By the end of the following day, I had my own handsome cabinet with plenty of storage space for family-night puzzles and board games—proving that, with the right tools and a little bit of effort, you can create a functional, quality piece of furniture that doesn’t drain your bank account.
Peter Sucheski
Working with cane
Made from the inner bark of the rattan palm, cane first gained popularity in the 1600s as a lightweight alternative to solid wood. For the frames of the door and drawer fronts, I chose a woven, open-mesh cane with holes spaced ½ inch on center. The sheets sold in most crafts stores are too small to cover my cabinet’s door and drawers, so I ordered a roll online, making sure it could cover the full width of each opening, and overhang all sides by at least an inch.
Tip
Soak the cane panels in lukewarm water for 30 minutes before stapling them in place. As the fibers dry, they shrink to a tight fit.
Step 1 – Prep the parts
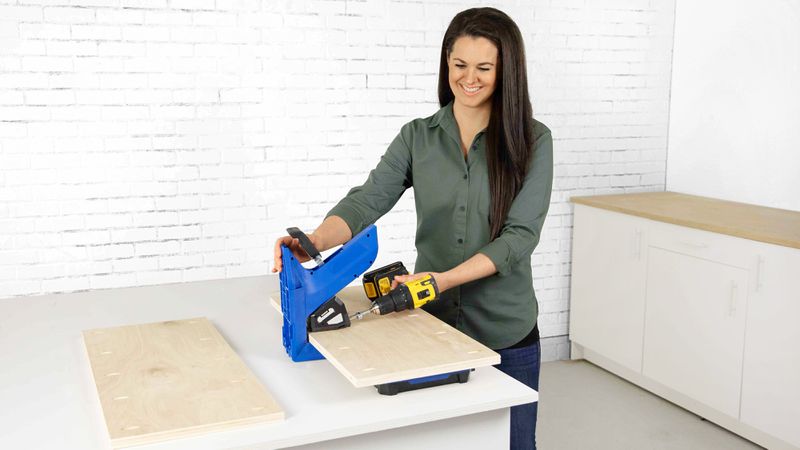
Jenn LargesseUsing the cut list, have the home center break down a 4-by-8-foot sheet of plywood. At home, cut the plywood and 1x2s to length on a miter saw. Use a circular saw to rip the top and supports to width and to taper the bottom 3 inches of each leg. Then use a pocket-hole jig (above) to drill through-edge holes where needed.
Step 2 – Assemble the sides

Jenn LargesseGlue and clamp 1×2 Legs to the plywood sides, then secure them with pocket-hole screws, as shown. Run glue along the back of the 1×2 trim. Turn the sides over and glue the trim between the legs, flush with the sides, top and bottom. Flip the sides over and shoot nails through the plywood and into the trim to secure it in place.
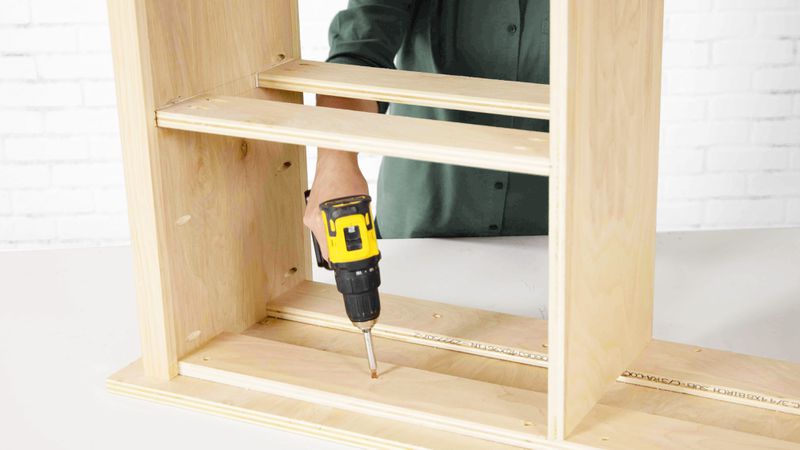
Step 3 – Attach the base
Jenn LargesseGlue the 1×2 trim to the front edge of the base so the trim’s top edge is flush with the base. Drive pocket-hole screws through the base to secure the trim. Now mark a line on the inside of the sidewalls 1½ inches from their bottom edges. Attach the base assembly to the sidewalls below these lines using glue and pocket-hole screws, as shown.
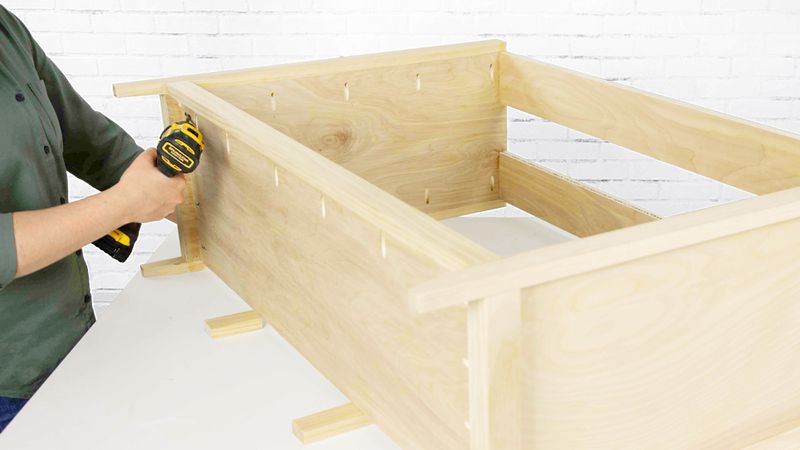
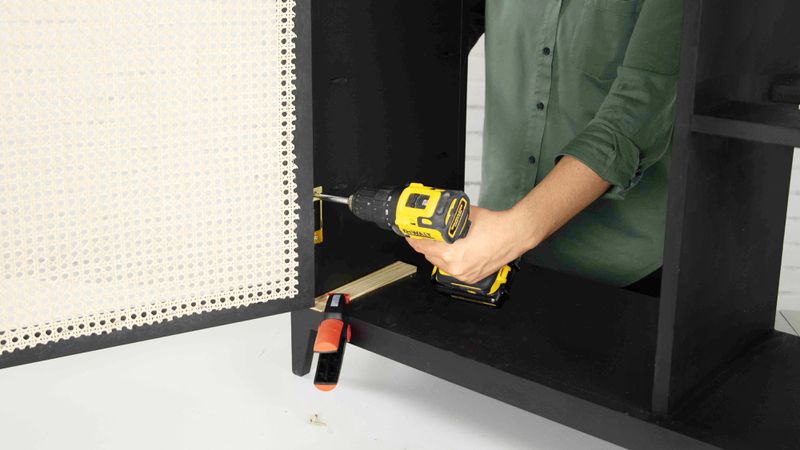
Step 4 – Install drawer supports
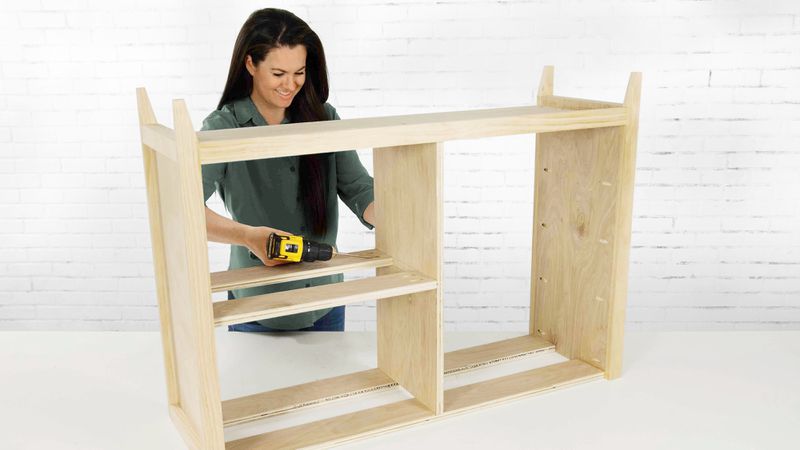
Jenn LargesseFit them between the sides, flush with their front and back edges; set the top pair flush with the sides’ top edges. Glue and pocket-screw each joint. Mark a centerline, front to back, across the supports. Set an upright divider on the line’s left side; drive wood screws into it through the supports and base. Fasten the middle supports, as shown.
Step 5 – Attach the top
Jenn LargesseWith the top upside down on the work surface, position the base assembly on it, flush with its back edge and centered along its width. Drill 1-inch-deep pilot holes through the supports and into the top (for a depth guide, wrap tape around the drill bit). Drive wood screws through the holes in the supports and into the top’s underside.
Step 6 – Assemble the door and drawer-front frames
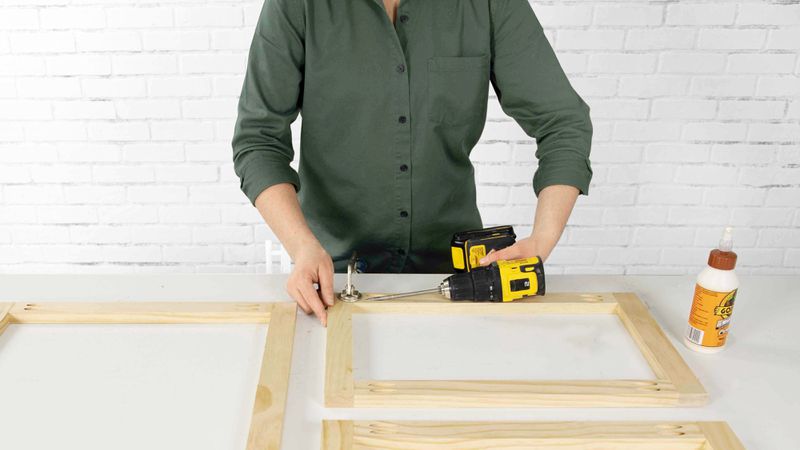
Jenn LargesseDrill two pocket holes at the end of each 1×2 rail. Apply glue to the ends of the door rails, position them between the stiles, then clamp each joint to hold the faces flush while driving a pocket-hole screw into each hole, as shown. Do the same for both drawer-front frames.
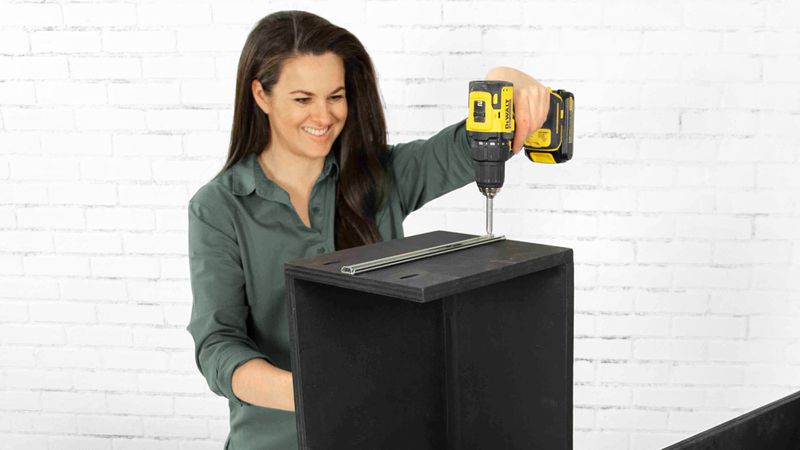
Step 7 – Build the drawers
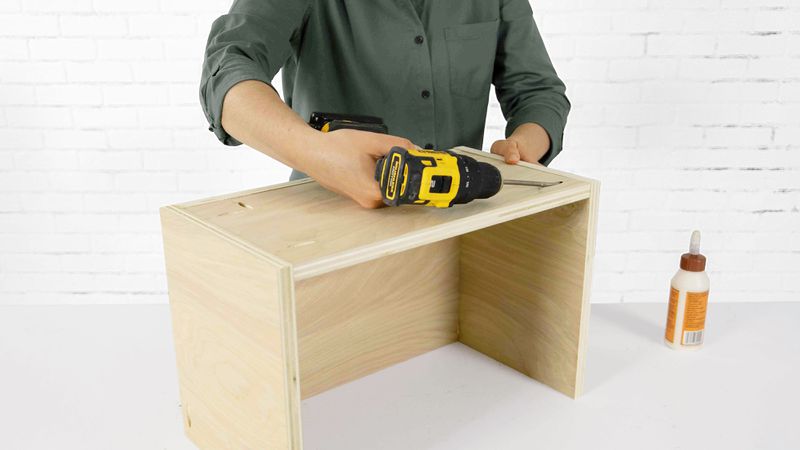
Jenn LargesseUse a circular saw to cut the drawer pieces. Drill pocket holes through the front and side edges of the base, the bottom and side edges of the back, and the front edge of the drawer’s sides. Glue and pocket-hole screw the back and base between the sides, as shown.
Step 8 – Paint the cabinet
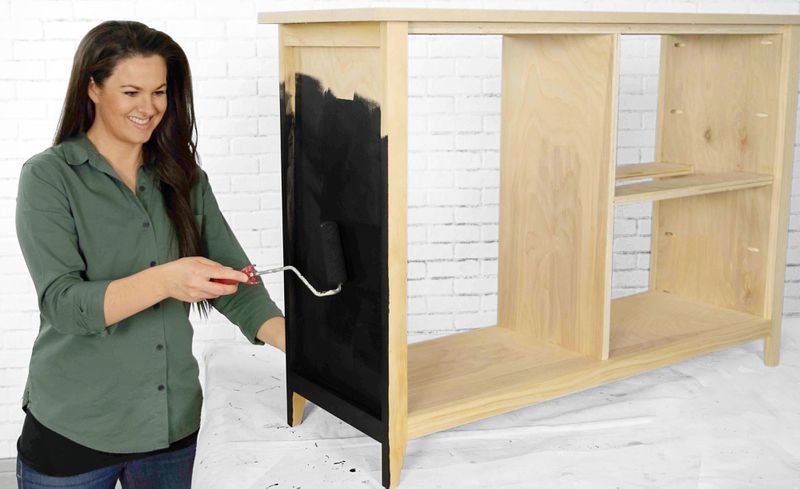
Jenn LargesseHide the exposed plywood edges with iron-on, edge-veneer tape, then trim it flush with a utility knife. Sand the wood surfaces with an orbital sander; wipe away the sawdust with a tack cloth. Using a foam roller and paintbrush, apply two coats of paint to every surface you can reach, including the drawer fronts, door frame, and back panel.
Step 9 – Attach the cane panels
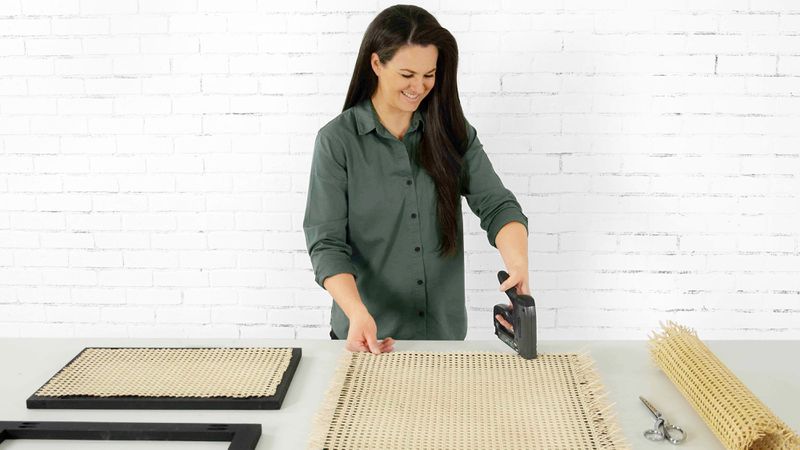
Jenn LargesseSoak the cane for 30 minutes in warm water, then cut it to size with scissors so it’s about an inch longer than the door opening’s height and width. Do the same for the drawer panels; leave each one 18 inches wide. Center the cane; secure its edges to the back of each frame with staples. Trim the excess with a utility knife and let it dry.
Step 10 – Install the doors
Jenn LargessePlace no-mortise hinge leaves on the edge of the door frame. Drill pilot holes through the hinge holes into the door edge, followed by screws. On the door’s right front edge, center and install a pull. Fit the door inside the opening; level it using a shim, as shown. Drive screws through the remaining hinge-leaf holes and into the front legs.
Step 11 – Install the drawers
Jenn LargesseScrew a pull to each drawer front’s top edge. Separate the slides; screw their inner halves, centered vertically and flush with the front, to the sides of both drawers. Rejoin the slides. Set the drawers in their openings on ¾-inch blocks. Pull them open slightly to reveal the slide holes; screw them to the sides. Fasten the drawer fronts to their boxes.
Step 12 – Attach the back panel
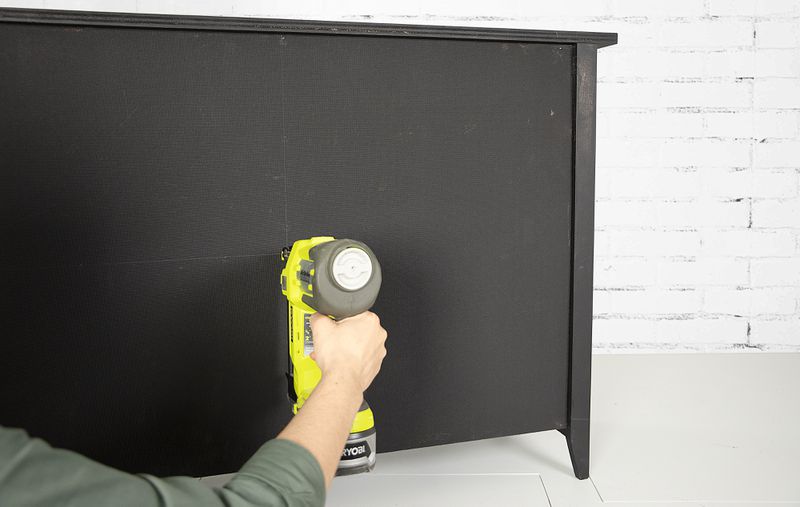
Jenn LargessePosition the panel against the back edge of the top support and the back edge of the base. Slide it down and mark the location of the center wall, and to the side to mark the location of the horizontal support. Move the panel back into position and nail it to the supports, the center wall, and the base using a brad nailer and ¾-inch nails.
Materials
¾” by 4’ by 8’ plywood panelFive 1×2 boards, 8’ long1/8” by 4’ by 8’ hardboard panelThree edge-style cabinet pullsTwo 3-inch no-mortise hingesFour 12-inch drawer slides1¼-inch wood screws1¼-inch pocket-hole screws¾-inch brad nails25 feet edge-veneer tape½-inch open-mesh cane, 18”-wide roll by 4’3⁄8-inch staplesWood glueTack clothMatte black paint-and-primer
Cut list
3/4-inch plywood top: one @ 45 inches W x 14 1/2 inches D 3/4-inch plywood side panel: two @ 12 inches D x 26 3/4 inches H3/4-inch plywood base: one @ 12 inches D x 39 inches W3/4-inch plywood center wall: one @ 12 inches D x 24 1/2 inches H3/4-inch plywood drawer supports: two @ 3 3/4 inches D x 19 1/2 inches W3/4-inch plywood top supports: two @ 4 inches D x 39 inches W
3/4-inch plywood drawer sides: four @ 12 inches D x 10 inches H3/4-inch plywood drawer base: two @ 12 inches D x 17 inches W3/4-inch plywood drawer back: two @ 9 ¼ inches H x 17 inches W
1×2 legs: four @ 29 3/4 inches1x2 sidewall trim: four @ 12 inches1x2 front trim: one @ 39 inches
1×2 door frame rails: two @ 16 1/4 inches1x2 door frame stiles: two @ 25 inches1x2 drawer frame rails: four @ 16 1/4 inches1x2 drawer frame stiles: four @ 12 1/2 inches
1/8-inch hardboard panel: one @ 26 inches H x 39 inches W