How to Patch a Vinyl Floor

>

A damaged floor can be fixed invisibly with a patch from the same material
Q: How do you repair vinyl flooring? Ours tore when we moved out an old refrigerator.
Carol Leonard, Milwaukee
Tom Silva replies: Sheet-vinyl flooring is durable but not indestructible. It can tear, as you know, or be sliced open if you drop a knife on it. Fortunately, vinyl repairs are easy enough to make and, if done correctly, nearly invisible. You just need a piece of the same flooring to serve as a patch. If you’re lucky, the installer left some scraps behind. If he didn’t, you can “harvest” a replacement piece from beneath an appliance or another out-of-the-way spot.
Most sheet-vinyl floors these days are glued only at the edges, which makes it easy to cut out the damage and harvest a patch. But if the entire floor is glued down, you’ll need a stiff putty knife or an oscillating tool with a scraper blade to lift these pieces.
Your patch may have a new sheen, but that will fade over time to match the surrounding flooring.
Shown: A damaged vinyl floor can be fixed with a patch from the same material.
Step 1: Cut Out the Patch
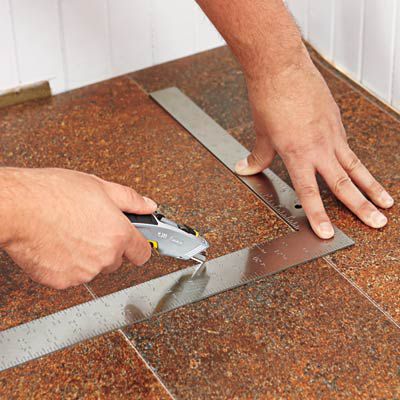
Photo by Ryan BenyiTo disguise the fix, replace the entire “tile,” or pattern, that’s damaged. Whether your patch is coming from a scrap piece or out of the floor, place a utility knife on the edge of the pattern and tilt the blade slightly—about 5 degrees—away from the center of the patch. Line up a framing square with the edge of the pattern and against the blade, then cut one side. Repeat on all sides, then pull the patch free.
Step 2: Remove the Damage
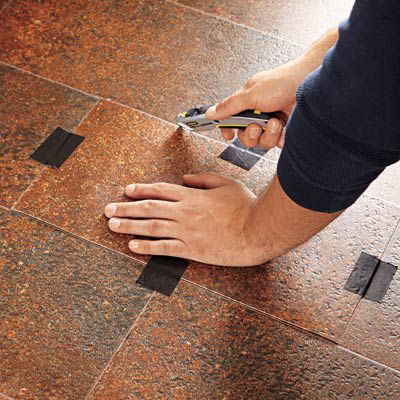
Photo by Ryan BenyiAffix the patch over the damaged area with double-stick tape, and secure the sides with masking tape. Mimicking the same 5-degree bevel, use the patch as a guide as you cut through the masking tape and existing flooring. Lift out the damaged area, and separate it from the patch.
Step 3: Butter the Patch
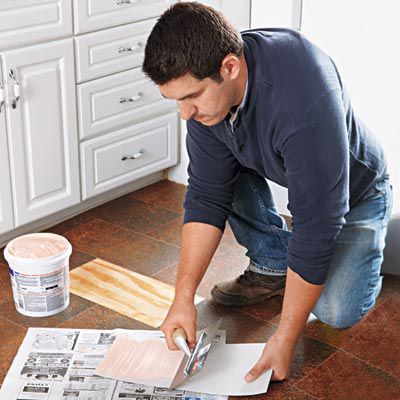
Photo by Ryan BenyiProtect the flooring near the patch with newspaper or cardboard. Spread the adhesive on the back of the patch using a 1/32-inch V-notch trowel (shown) or a paint roller fitted with a 3/16-inch nap cover.
Step 4: Glue Down the Edges
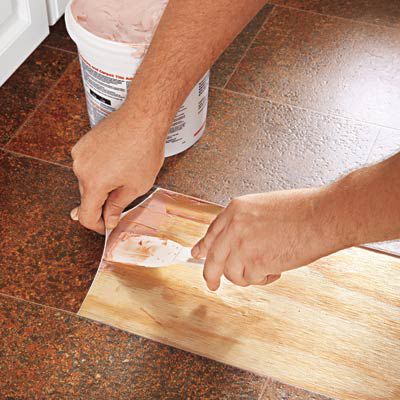
Photo by Ryan BenyiAssuming the flooring is glued only at the perimeter, you’ll need a vinyl flooring adhesive to secure the edge of the area to be patched. Lift up the cut edges, and use a putty knife to spread a 1-inch-wide band of adhesive under the flooring, one side at a time. Wait a few minutes for the adhesive to become tacky, then press the edges into the glue with a J-roller.
Step 5: Install the Patch
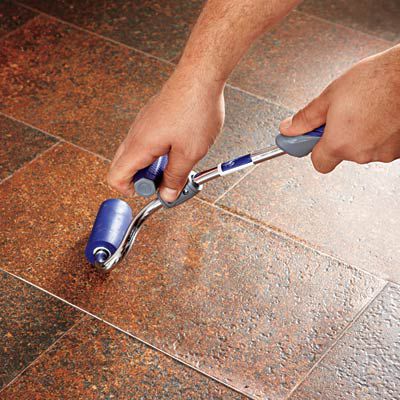
Photo by Ryan BenyiWait a few minutes for the adhesive to become tacky, then press the patch firmly onto the floor. Work from the center of the patch to the edges with the J-roller. Use a damp rag to wipe away any adhesive that squeezes out.
Step 6: Seal the Joints

Photo by Ryan BenyiFill the joint where the patch meets the floor with a bead of seam sealer, a type of glue. Wipe up the excess with a damp rag, and run the J-roller over the seams. Wipe them again. The sealer dries clear. Wait 24 hours before walking on the patch.