How to Build a Firewood Storage Bench

>
House One editor and DIY expert Jenn Largesse shares how to build a sturdy cedar seat that keeps firewood close.
This story originally appeared in the Winter 2021 Issue of This Old House Magazine. Click here to learn how to subscribe.
Crackling wood fires have always been an evening tradition in our family, but trekking out to the woodpile to retrieve an armload of logs has never been anyone’s favorite activity. So I decided to build something that would put a stockpile of dry wood just outside the door. Instead of the typical log rack, I settled on a storage bench with space for firewood that provides a convenient seat for taking off snowy boots.
The slatted design is quick and easy to put together—there’s no complicated joinery—and because it’s clad in western red cedar over an inner structure of sturdy cedar 2×s, I can leave it outside year-round, sheltered on our front porch. With our wood supply now just steps from the entry, keeping the fire stoked is less of a chore.
Here’s how to build a bench of your own.
Getting Started
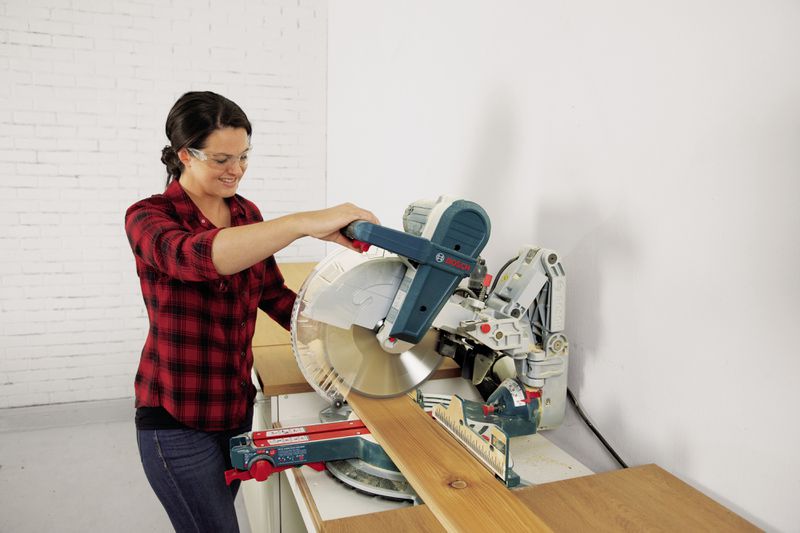
Jenn LargesseMaking wide cuts. Jenn uses her sliding compound miter saw to cut 1×6 cedar boards to length. She also used the saw to miter the bench’s face boards.Cedar boards are an excellent choice for this project because they weather the elements, resist rot, and repel insects. But cedar is also quite soft, so expect it to get dinged and nicked as firewood is loaded into and taken out of it.
When buying cedar, pay attention to how thick the boards are; some lumberyards carry 7/8-inch-thick material instead of ¾-inch-thick stock. Both thicknesses will work fine for this project, but thicker boards on the sides will require slightly longer pieces on top.
Scroll down for a list of tools and materials for this project.
Cut List

Peter Sucheski1x6 legs (outside): six @ 17 1/4 inches 1×6 top: three @ 48 inches 1×6 shelf: three @ 43 1/2 inches 2×4 frame (top and bottom): four @ 18 inches 2×4 seat frame support: two @ 39 1/2 inches 2×4 seat frame support: one @ 11 inches 2×4 frame (sides): four @ 14 1/4 inches 2×4 shelf support: one @ 15 inches
Steps for Building a Firewood Storage Bench
Step 1: Prep for assembly

Jenn LargesseFollowing the cut list, use a miter saw to cut the cedar 2×4s and 1×6s to length. Set aside an 8-foot 1×6 for the face frame. Next, use a pocket-hole jig to drill two pocket holes into each end of the long 2×4 seat-frame pieces and the crosspiece, as shown.
Step 2: Assemble the legs
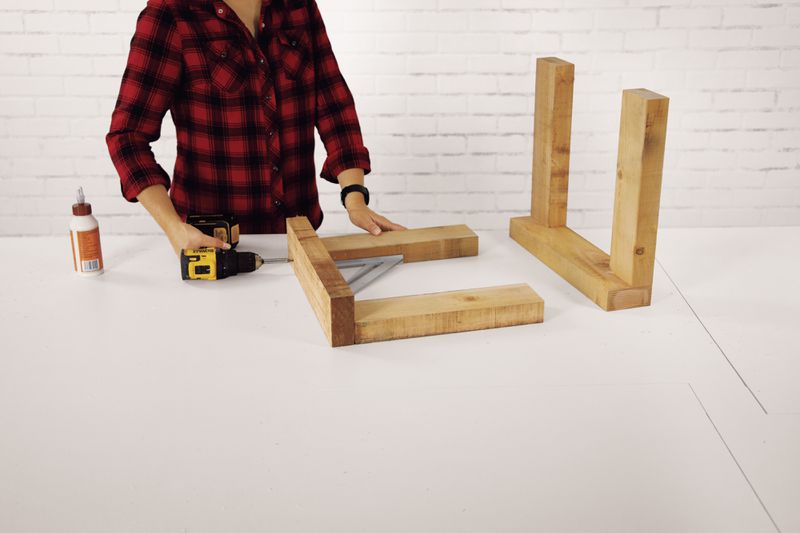
Full buyoutSet a 2×4 base board on the edge and position two leg pieces against it, facedown and aligned with the board’s ends. Apply glue to the legs’ ends; drill two pilot holes through the base and into the legs. Drive 3-inch deck screws into the pilot holes. A rafter square, shown, keeps the parts perpendicular. Assemble the second leg the same way.
Step 3: Assemble the top
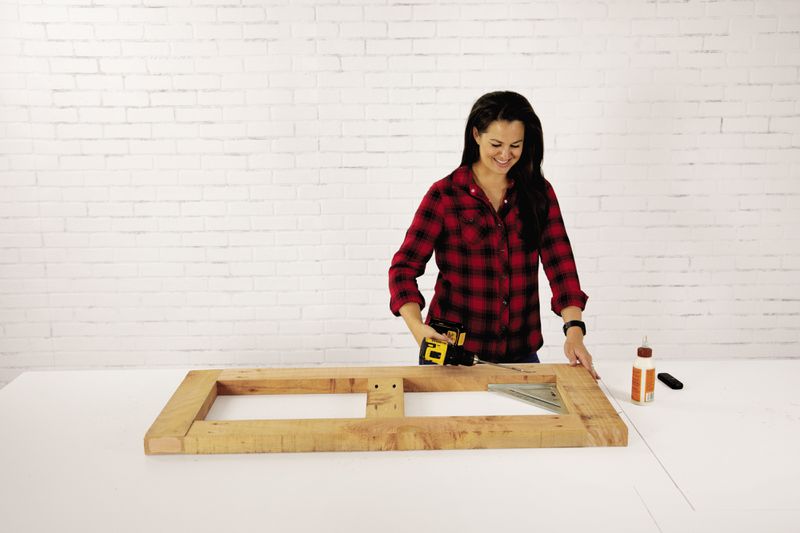
Jenn LargesseWith the pocket holes facing up, align and glue together the ends of the 2×4 seat-frame pieces. Keeping them perpendicular with a rafter square, drive pocket-hole screws through the ends of the long boards and into the end boards, as shown. Center the 2×4 crosspiece and install it the same way, with glue and pocket-hole screws.
Step 4: Attach the top and legs
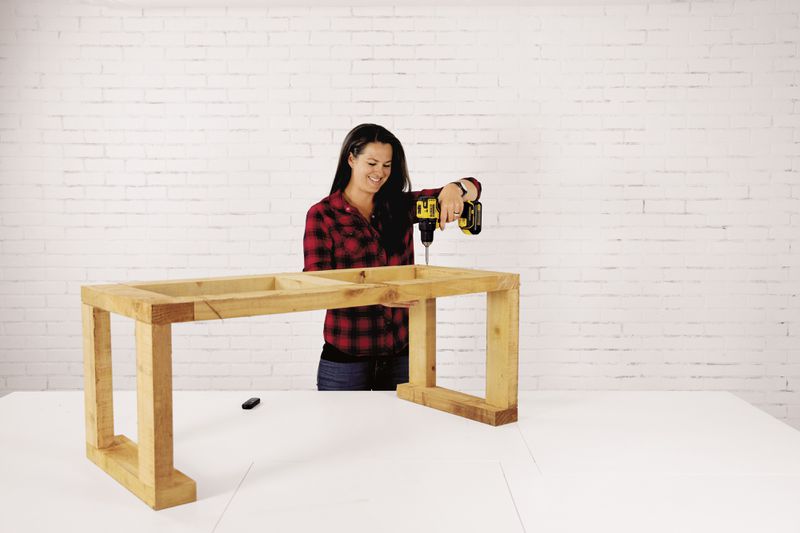
Jenn LargesseStand the legs upright, so the base boards face inward. Apply glue to the tops of the legs; set the assembled seat frame on them, flush with their outside edges, pocket holes facing down. Drill two pilot holes through the seat frame and into the top of each leg. Fasten the seat to the legs with deck screws driven through each pilot hole.
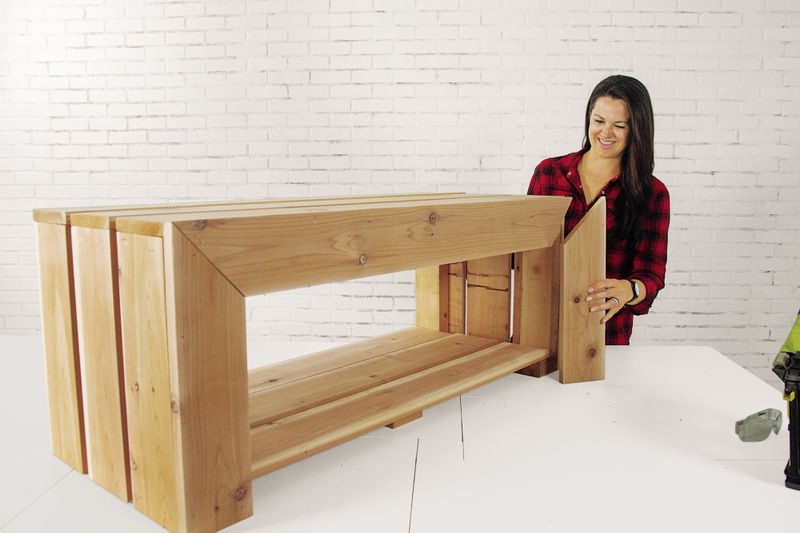
Step 5: Clad the ends
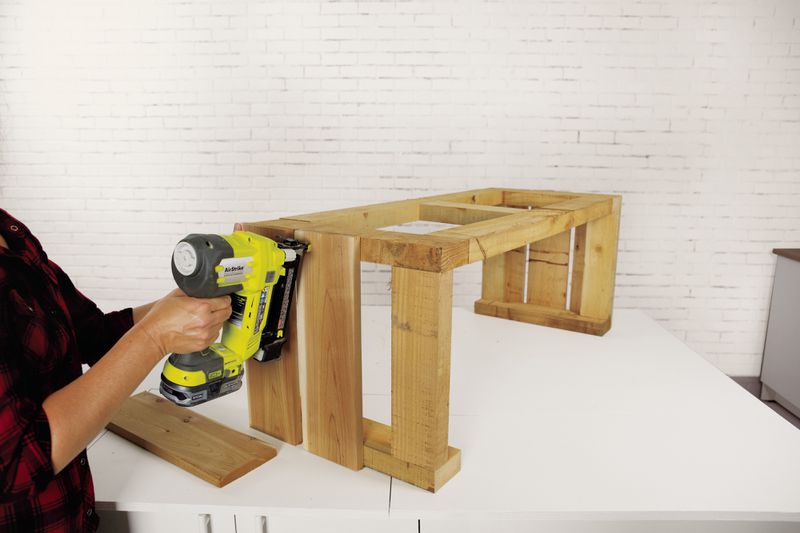
Jenn LargesseApply glue to one face at each end of the 1×6 cedar cladding. Position one vertically against the frame, flush with its back edge, and secure it with 1½- inch nails. Using a 3/4-inch-thick spacer, set a second 1× against the first one and nail it to the frame. Nail the third end piece flush with the front edge. Do the same on the bench’s other end.
Step 6: Make the seat
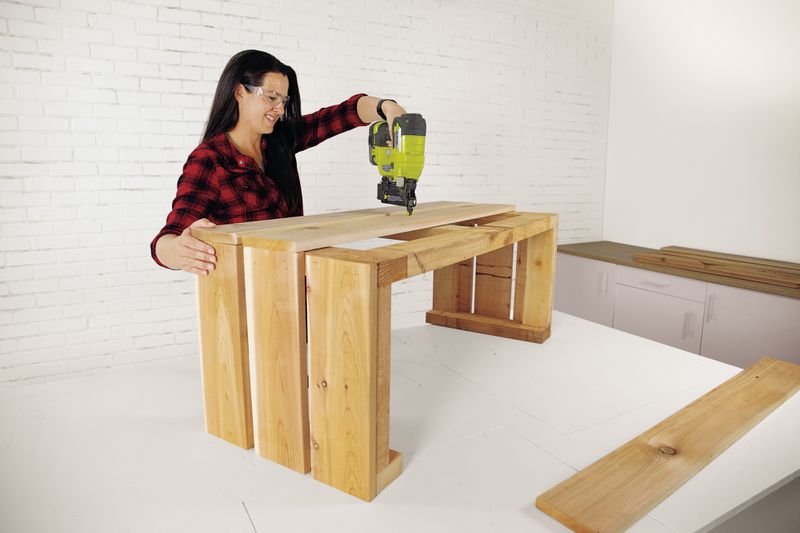
Apply glue to the frame’s top and the end cladding. Position the first cedar seat board flush with the front edge, and so it covers the end cladding. Drive nails through the seat board into the end cladding and the frame. Using 3/4- inch spacers, nail the next seat board parallel to the first one. Nail the last board flush with the frame’s back edge.
Step 7: Add the shelf and support
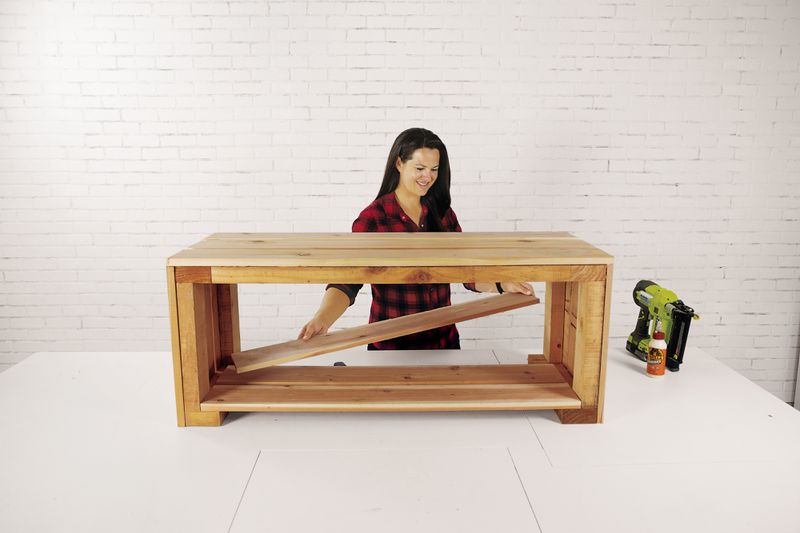
Apply glue to the base board’s face.Bed the shelf ends in the glue. Center the middle board and position the front and back ones flush with their respective frame edges. Nail the shelf boards to the base board. Apply glue to the top face of the 2×4 support.Center it and set its end flush with the frame’s back edge; nail the shelf boards to it.
Step 8: Secure the face frame
Jenn LargesseMiter one end of each vertical 1×6 face-frame piece and both ends of the horizontal face frame. Apply glue to the front edges of the frame, cedar seat board, and cladding. Nail the pieces to the frame, flush with the top edge of the seat and outside ends of the legs.
What You Need for This Project
Tools:
Materials:
Three 2×4 cedar boards, each 8 feet longFive 1×6 cedar boards, each 8 feet long3-inch No. 10 stainless-steel deck screws2½-inch stainless-steel pocket-hole screws1½-inch 18-gauge nailsExterior wood glue