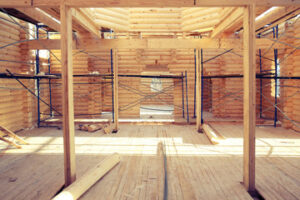
Log Home Restoration – The First Step
Log home restoration requires expertise and a can-do attitude. It also involves educating yourself and finding a contractor who understands the process, techniques, and procedures that are required to complete the work correctly.
Keeping up with recommended maintenance will keep your logs healthy and prevent costly restoration work in the future. A good inspection will highlight areas that need chinking or staining. Make sure to click here at https://richardsonloghomes.com/ to talk to a professional.
Preparation
Log home restoration consists of several processes such as chinking, caulking, rot repair, borate preservatives, and staining. The first step is surface preparation which takes a great deal of time but is critical to ensuring that the new stains or sealants work long term. It involves proper analysis of the log home to locate moisture problems, hot and cold spots, mold and mildew, fungus, UV breakdown of the wood, insect damage, or rodent damage. This is done before starting any other work on the log home such as cleaning, stripping, and sanding or blasting with crushed glass (media blasting).
The three methods currently in use for removing existing finishes from your log home are sanding, or chemical strippers. All of them are extremely labor-intensive and time-consuming but are a necessary part of the restoration process. Taping all windows, frames, electrical outlets, junction boxes, and aluminum flashing with non-residue duct tape is also recommended.
If you are deciding to have your log home or cabin re-stained it is important to understand that a good quality stain can last 4 to 6 years depending on the climate and weather conditions. However, to get the maximum benefit from your stain it should be reapplied every 2 to 3 years. The reason is that over time the stain can wear away exposing the wood to the elements, such as UV degradation and water infiltration.
One of the most important things to do is to ensure that your logs can “breathe”. If they are encapsulated by an old coating such as paint this can cause the wood to rot over time. It is also important to check your gutters twice a year, once in the spring and once in the fall to make sure that they are not clogged and creating undue moisture conditions on the logs of your home.
If you are considering having your log home restored, we recommend that you hire an experienced professional who is familiar with all of the methods available for preparing log homes for a new coat of finish. This will prevent any costly mistakes that could result in a failed finish or more serious issues down the road like air/water infiltration, dust problems, mold, mildew, or insect and rodent damage.
Inspection
Log homes need to be inspected frequently, especially in the spring and fall. This allows you to take action before problems develop. If you are considering purchasing an older log home or have one in need of restoration, a professional inspection is vital. The inspector you choose must have experience with log structures. It is possible for a home inspector with little experience in this type of construction to miss many critical issues that may affect the logs, roof, and foundation of the structure.
When inspecting a log home, look for large cracks or checks in the walls. It is normal for some cracking to occur as the wood ages and dries but large cracks allow dirt to enter the logs and may lead to rot, mold, mildew, and insect damage.
It is also important to check for chinking that needs renewing, backer bar, and new thinking on log ends and areas where a wall joins with another. These are areas where moisture can enter and cause rot, mold, mildew, insect, and rodent damage.
An inspection should also include checking the overall condition of the roof and gutters. If the gutters are clogged it can cause water to run over the logs and lead to rot, mold, fungus, and other serious problems.
Another area to examine is the log home’s windows and doors. Many times, the seals on these areas need to be replaced during a restoration. This can help reduce air infiltration that can cause moisture problems, hot and cold spots, and even mold and mildew.
If you have a home with vinyl log siding, it is important to remove the vinyl and inspect the logs underneath. Look for areas where the logs have a greenish tinge or are discolored, these are signs of moisture infiltration and could lead to rot, mold, mildew, insects, and other problems. The logs should be sanded and cleaned before they are re-chinked, caulked, and restained with borate preservatives. Staining is done last, the logs must be properly prepared so the stain will adhere well and protect them long-term.
Repair
Whether it’s an older log home that needs significant repair or a newer one that hasn’t been maintained correctly, the first step in the log home restoration process is to perform an inspection of the structure. This will note areas of moisture damage, determine the extent to which the logs are rotted, and identify other potential problems that may be present. The inspector can also make recommendations to help homeowners prioritize the work needed and develop a realistic budget.
Moisture damage is the most common reason for log home restoration and can be quite extensive if not corrected immediately. As soon as a log starts to absorb too much moisture, it begins to degrade and will spread quickly to adjacent logs. The most important thing for log homeowners to do to combat this is to keep their cabin properly insulated and stain it regularly.
The next step in the restoration process is to perform a thorough cleaning of the logs. This is a vital step to ensure that any new caulking, chinking, and borate preservatives are applied correctly and to the best quality. This is also a good opportunity to clean out any debris or spiderwebs that have accumulated.
This is also the time to consider re-staining the cabin. It’s generally recommended that log homes are re-stained every 5-7 years to maintain their color and protect them from water damage.
If the existing stain has dark spots or is worn down, a professional can strip the existing finish by sanding, media blasting, or chemical strippers. This is often the most time-consuming part of the restoration process but is necessary to remove any rotten wood or mold and give the crew a blank canvas for the rest of the work.
Once the logs have been cleaned they are ready for a new coat of stain. Typically, a high-quality water-based stain will be used. Depending on the weather conditions in your area, you may need to stain more frequently than other log homeowners.
In some cases, the logs will need to be replaced due to excessive damage. In this case, the damaged logs will need to be chiseled out and treated with a wood preservative before being replaced.
Finishing
Log homes are different from conventional houses in many ways, but even these one-of-a-kind structures need regular upkeep and maintenance to stay looking their best. That’s why it’s important to hire a professional for any work that goes beyond routine. Log home professionals know how to maintain and repair these unique structures while protecting their value, making them look new for years to come.
The first step in any restoration is to clean or strip the old finish, which can include power washing and chemical strippers if necessary. This is done to remove all dirt, pollen, grit, moss, spider webs, bird droppings, and any other residue that’s collected on the exterior of the home. This step is especially important if the logs are stained. A good cleaning also gives the contractors a chance to check for any damage or areas of concern that need attention.
After the logs have been cleaned, they can be treated with a borate treatment, which will repel organisms that can invade and destroy your logs. This is a great way to protect your home, and it’s usually done after the final stain coat has been applied. This step is an investment that will help to protect your home and ensure a long life for the stains, sealers, and other finishes used on your home.
Once the logs are ready for a fresh coat of finish, a professional will typically spray the logs with the new product. They’ll then use a brush to apply the stain and make sure the logs are properly covered. It’s usually a good idea to use an oil-based stain since it will last longer than water-based ones.
It’s also a good idea to apply another layer of energy seal once the logs have been stained. This is a great way to prevent water and moisture from damaging the logs in the future. Once the stain has dried, the logs can be chinked or caulked to fill in gaps between them. This is the part of the process that can take the longest, and it’s best left to the experts to ensure that the work is done correctly.